Indoor Rock-Climbing · Field Guide
First Time on the Wall
Gear, Preparation and Fundamental Moves
for Beginner Indoor Climbers
Scroll ↓
Gear, Preparation and Fundamental Moves
for Beginner Indoor Climbers
A friend invites you to go climbing over the weekend, and you readily agree. But as you stand at the entrance of the shopping-mall climbing gym, staring at the colorful holds on the wall, you cannot help wondering: what should I bring? What should I wear? Which route should I try? Will everyone instantly tell I am a total beginner?
Relax. This guide walks you through every first-visit question — from gear and clothing to the three techniques that separate smooth climbing from flailing.
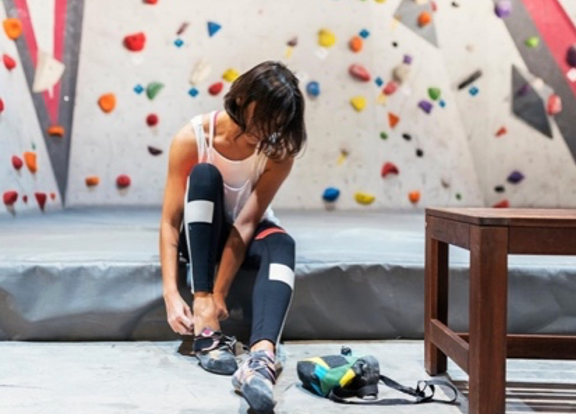
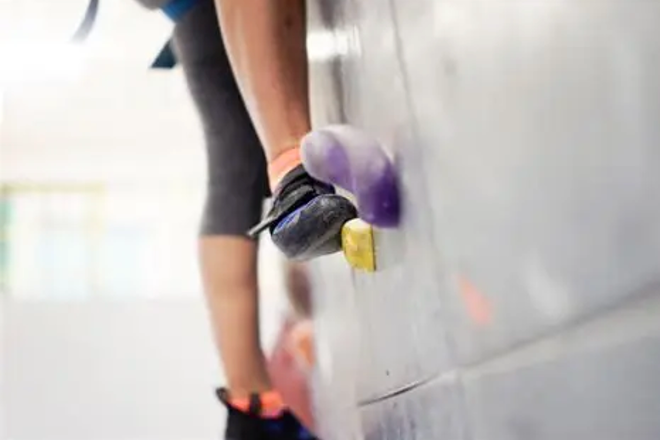
This is the only piece of specialized gear you do not need to buy yourself. Gyms offer sanitized rental climbing shoes. They will feel tight, with your toes curled inward — and that is completely normal. Instructors will tell you this tight fit lets your toes generate precise footwork.

You will notice climbers reach into a small bag around their waist to grab white chalk before climbing. That pouch is a chalk bag, and the powder inside is chalk — essential for climbers. It absorbs sweat from your hands, greatly increasing friction between your fingertips and the holds, and effectively prevents slips and falls.
Standing in front of your wardrobe, your choice is simple: pick loose, breathable activewear. You do not need high-performance technical fabrics — a regular cotton T-shirt paired with sports trousers works perfectly well.
Remove all jewelry. Necklaces, bracelets and rings can catch on climbing holds and become dangerous hooks. If you wear glasses, contact lenses are preferred.

Usually only 1–10 RMB at the front desk. A tiny price for real peace of mind.
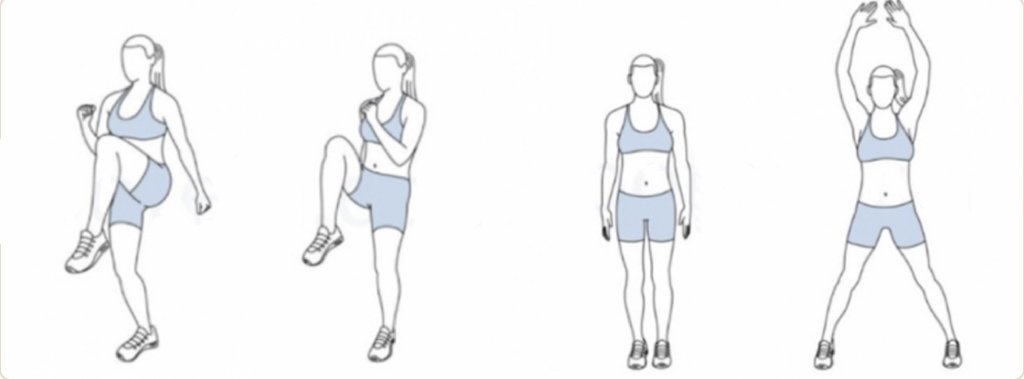
This is the most important step, yet it is often overlooked. Climbing activates many small muscle groups you rarely use in daily life — especially in your fingers, wrists and shoulders. A proper warm-up raises your body temperature, boosts blood flow to muscles, improves flexibility in muscles and joints, and serves as your first line of defense against sports injuries.
Spend 5–10 minutes on dynamic warm-up drills:
Warm up first, then study the wall — start, same-color holds, tape, end point
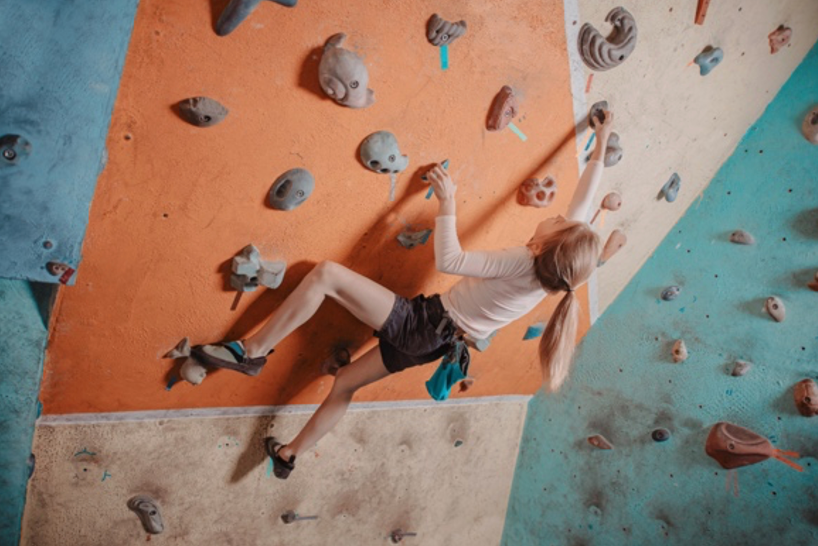
Bouldering is very different. No harness or rope is required. Walls are lower, roughly 3–5 meters tall, and thick padded mats on the floor absorb impact if you fall.
Bouldering needs minimal gear, and you can practice alone. Routes are short but full of fun — it tests your explosive power, body coordination, and puzzle-solving thinking as you work out how to move through each sequence.
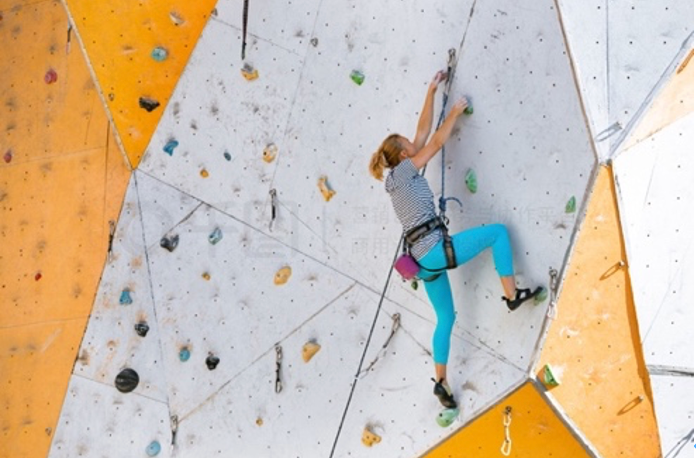
The climber puts on a safety harness attached to a rope. A belayer on the ground keeps you safe with belay devices. Walls are generally 10–15 meters high.
Top-roping requires trust and teamwork with your partner. You also need to learn how to operate ropes and belay gear. It delivers great challenge and a strong sense of achievement.
Most climbers and coaches recommend new-comers begin with bouldering. The barrier to entry is much lower. All you really need is a pair of climbing shoes — no partner is needed for belaying, so you can show up at the gym and start right away for a relaxed, accessible experience.
From here on, this article focuses on bouldering and covers all the essential knowledge and skills for beginners.
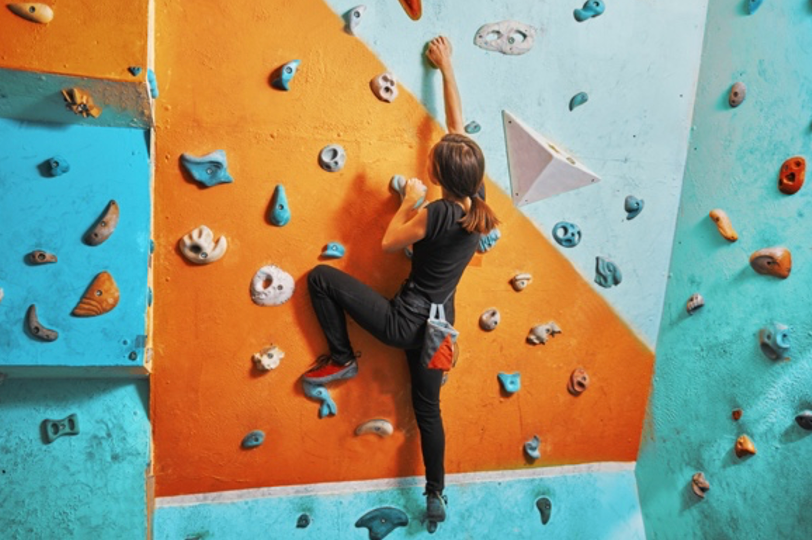
Gyms mark each route using holds of one single color. For example, on a yellow route you may only use yellow holds for hands and feet.

Four real example routes, each marked with holds of a single color
Tape marks the starting holds. You must place both hands firmly on the start and lift your body off the ground to officially begin the climb.
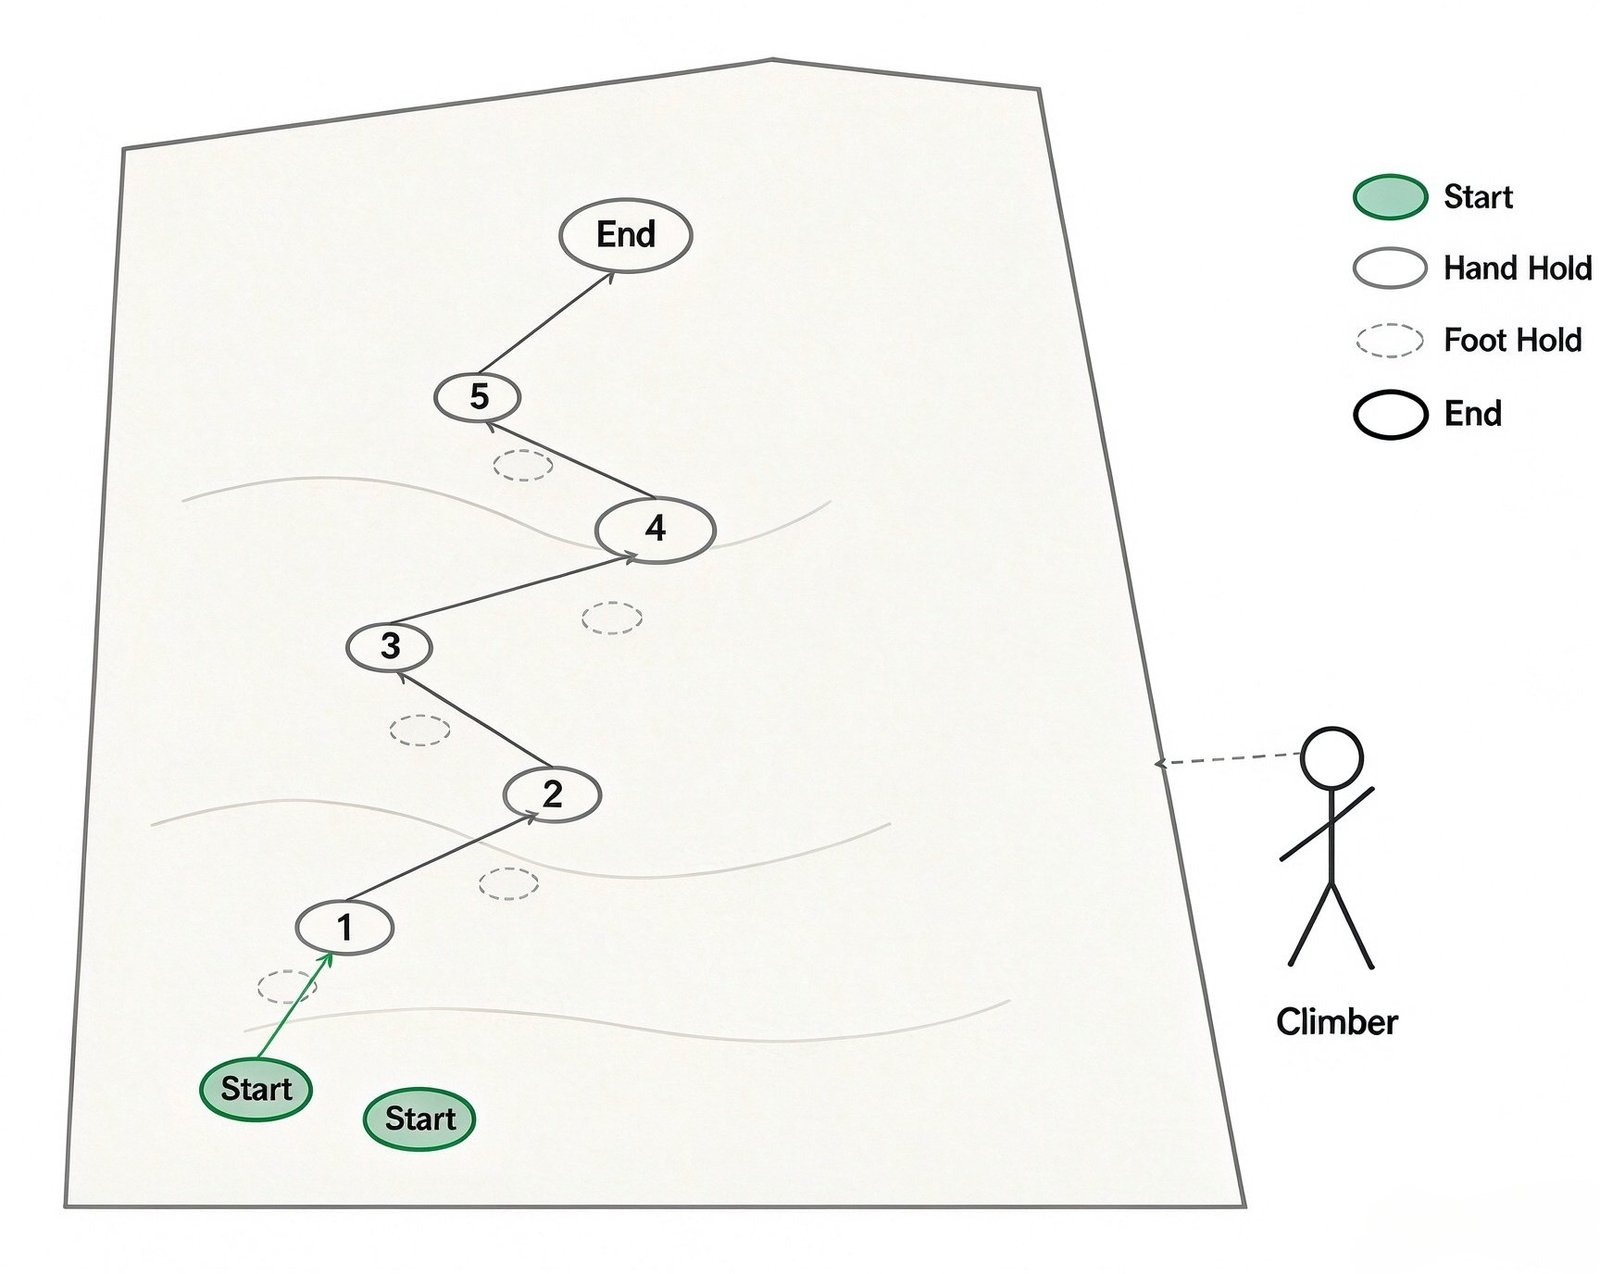
The highest hold on the route, also marked with tape. You must hold the finish hold steadily with both hands for several seconds to complete the route.
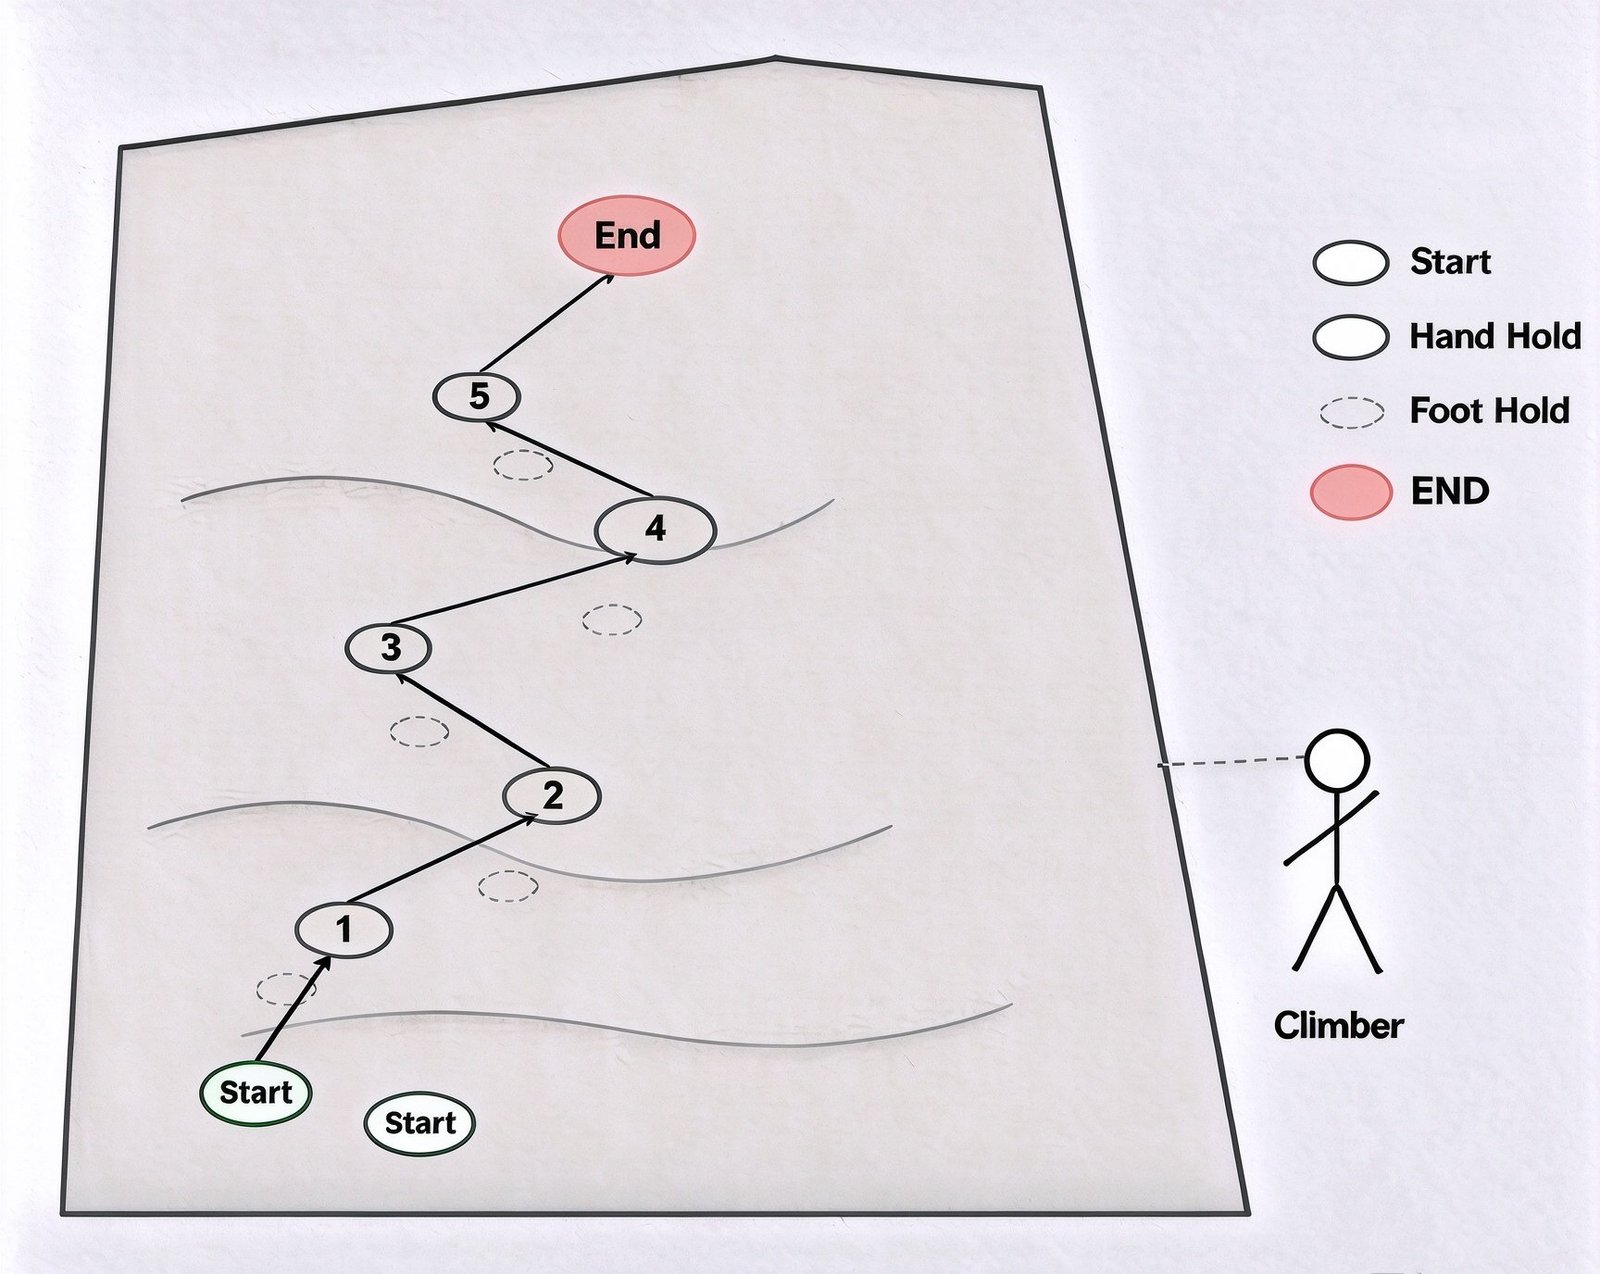
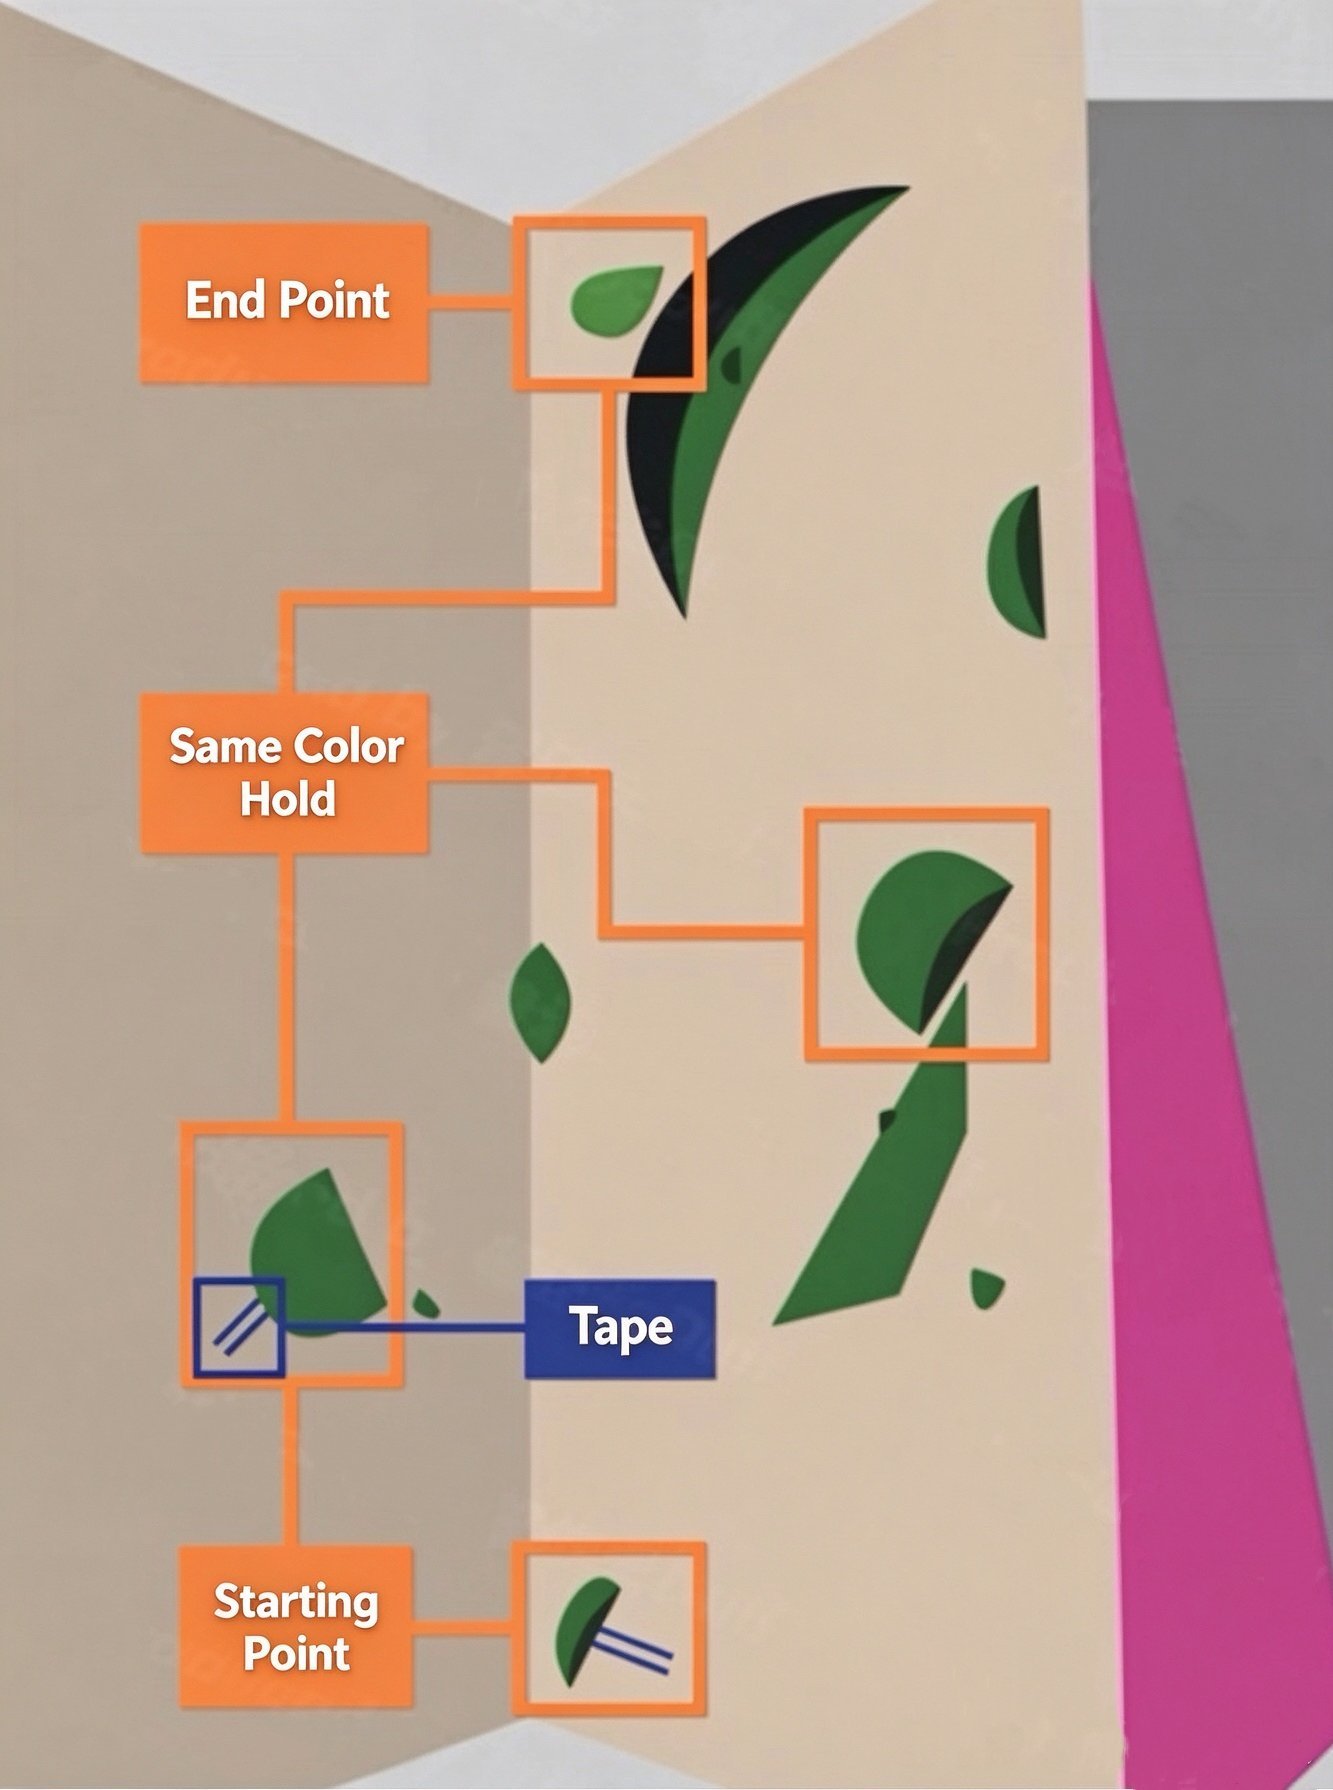
Before you leave the ground, scan the wall from bottom to top and find these four markers:
Marks out the starting point of your route.
Place both hands firmly on the taped holds to begin the climb.
Follow only the holds of one color, hand and foot.
Grip the top hold with both hands, steady, to finish.
Route diagram — how one full route reads on the wall
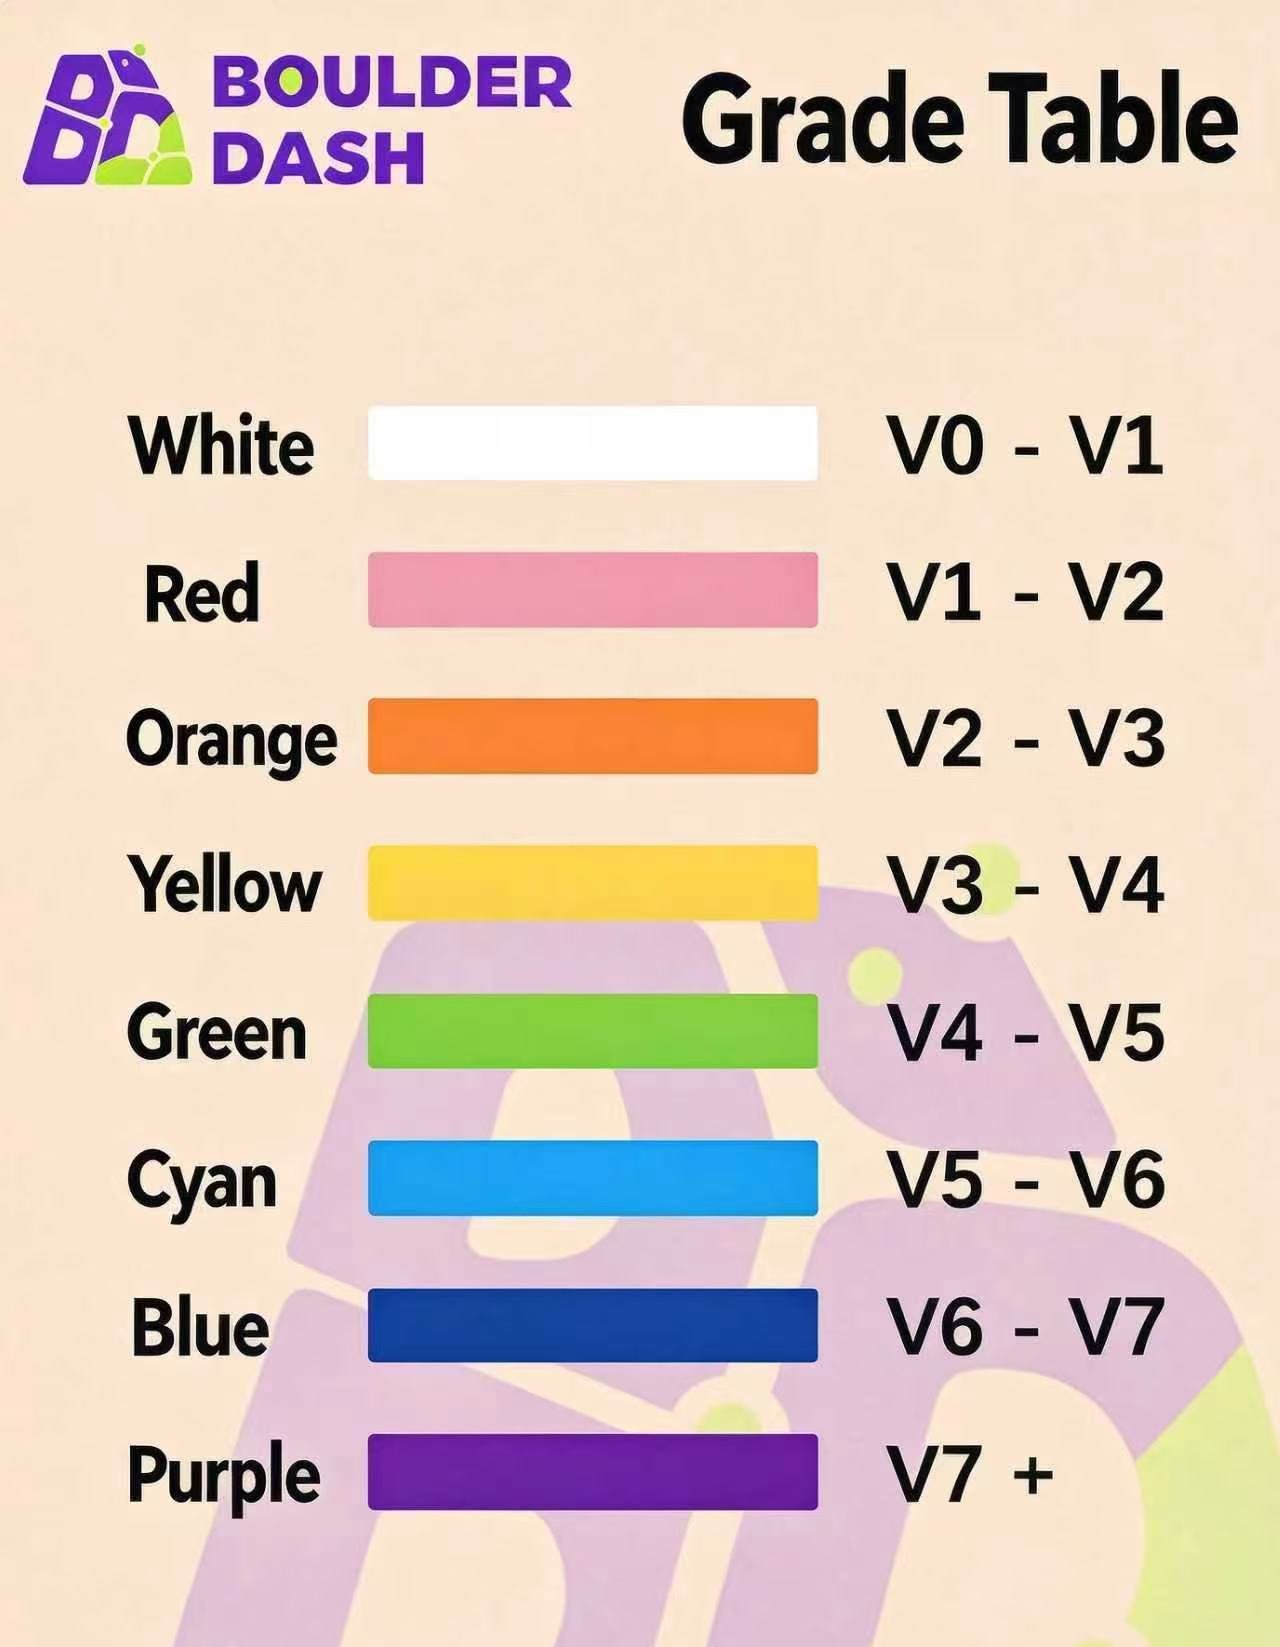
Bouldering routes are graded using the V-Scale system (V0, V1, V2 and so on — higher numbers mean harder routes). Some gyms use colored tape instead.
As a beginner, start confidently at V0 or the easiest grade marked in the gym; building confidence matters most.
This is the most critical mindset shift for new climbers. Think of your body as a ladder. Your hands are there mainly to keep balance, not to pull your entire weight upward like doing pull-ups. Your real driving force comes from your strong leg muscles. Focus on using your feet to push your body upward.
Watch experienced climbers: when they pause on the wall to think, their arms stay almost fully extended. Hanging with straight arms lets your bones and ligaments carry your weight, so your muscles burn far less energy. If you keep your arms bent, your biceps and forearms will fatigue rapidly — this is known as over-gripping. Remind yourself constantly: relax, keep arms straight.
 ✕ Always bent
✓ Naturally straight
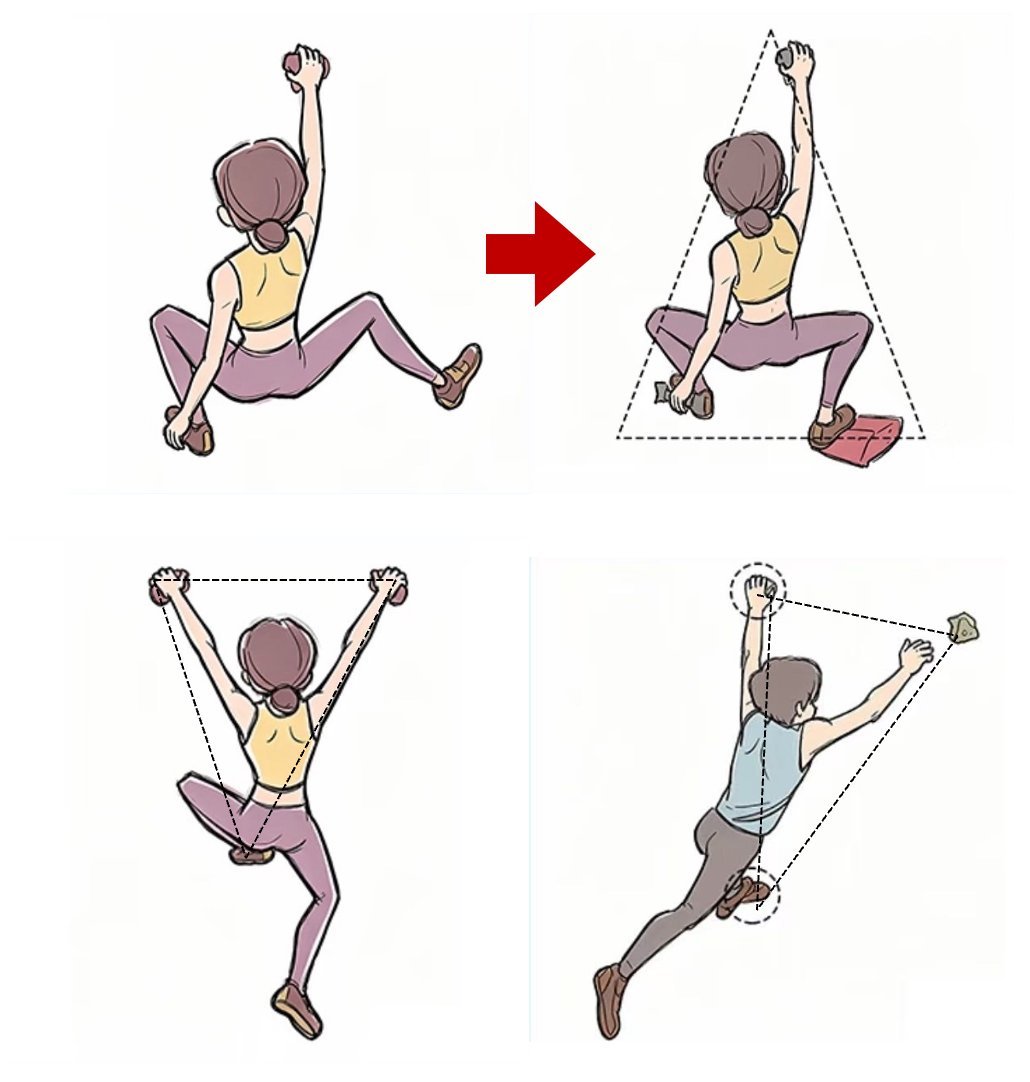
This golden rule keeps you balanced on the wall. Triangles create stability.
You have four limbs, so follow this triangular principle: keep two feet + one hand attached while moving your free hand; or keep two hands + one foot attached while moving your free foot. Always maintain three points of contact with the wall, and you will stay balanced and safe.
Falling is a natural part of bouldering. Learning safe falling is more important than any climbing skill. Gym mats offer good protection, but you must use them correctly.
Never catch yourself with your hands! This is extremely dangerous and commonly causes wrist, elbow or shoulder injuries.
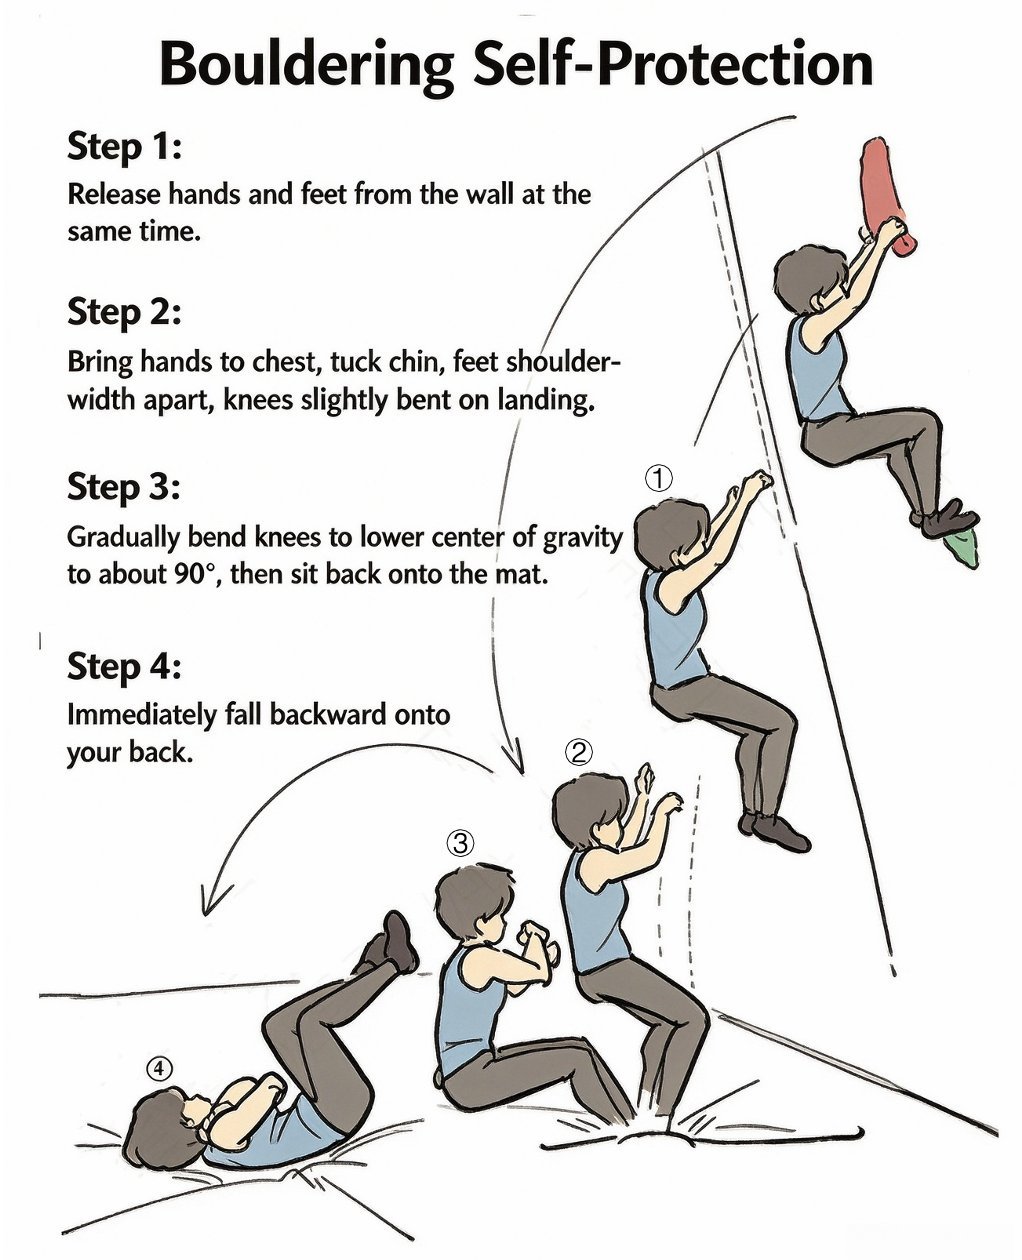
The landing sequence: away from the wall → hands to chest → knees bent → sit back → roll
— Congratulations! —
You now have all the core knowledge to get started with indoor climbing. Remember this climbing truth: technique comes before raw strength.
Every route on the wall represents a fresh challenge and puzzle. Do not fear failure. Every attempt and every fall build you into a stronger, smarter climber.